 |
 |
| Board |
 |
| Schematic |
Purpose:
The purpose of this exam was to test all of the skills we learned this year. The main focus of the year was creating standalone projects. These standalone projects required us to know how to breadboard, read a circuit diagram, read data sheets, make board layouts in Eagle, read circuits developed in Eagle, etch boards, drill boards, and solder. We also had to know basic functions of common parts, like transistors and SPST switches. This project tests all of these skills by requiring us to read an Eagle circuit diagram, breadboard, and solder.
Photo Gallery:


Final Exam: Memory
Memory:
 The goal of this exam is to construct a permanent working
version of Memory. Memory is a recreational activity based
on an electronic circuit in which the user is required to remember and recall a
random sequence of four red and green flashes in quick succession from a
bicolor LED. The user has up to 10s at
the end of the sequence to reproduce it by setting each of four switches, from left
to right, before submitting his response for confirmation by pressing the TEST switch. If the user’s response is correct, the bicolor
LED displays green,
otherwise it displays red. A potentiometer (SKILL) can
be used to adjust the difficulty of the game by influencing the interval of
time between flashes. A RESET switch is used to reboot the microcontroller.
The goal of this exam is to construct a permanent working
version of Memory. Memory is a recreational activity based
on an electronic circuit in which the user is required to remember and recall a
random sequence of four red and green flashes in quick succession from a
bicolor LED. The user has up to 10s at
the end of the sequence to reproduce it by setting each of four switches, from left
to right, before submitting his response for confirmation by pressing the TEST switch. If the user’s response is correct, the bicolor
LED displays green,
otherwise it displays red. A potentiometer (SKILL) can
be used to adjust the difficulty of the game by influencing the interval of
time between flashes. A RESET switch is used to reboot the microcontroller.
Task:
Procedure:
Parts List:
Memory:
 The goal of this exam is to construct a permanent working
version of Memory. Memory is a recreational activity based
on an electronic circuit in which the user is required to remember and recall a
random sequence of four red and green flashes in quick succession from a
bicolor LED. The user has up to 10s at
the end of the sequence to reproduce it by setting each of four switches, from left
to right, before submitting his response for confirmation by pressing the TEST switch. If the user’s response is correct, the bicolor
LED displays green,
otherwise it displays red. A potentiometer (SKILL) can
be used to adjust the difficulty of the game by influencing the interval of
time between flashes. A RESET switch is used to reboot the microcontroller.
The goal of this exam is to construct a permanent working
version of Memory. Memory is a recreational activity based
on an electronic circuit in which the user is required to remember and recall a
random sequence of four red and green flashes in quick succession from a
bicolor LED. The user has up to 10s at
the end of the sequence to reproduce it by setting each of four switches, from left
to right, before submitting his response for confirmation by pressing the TEST switch. If the user’s response is correct, the bicolor
LED displays green,
otherwise it displays red. A potentiometer (SKILL) can
be used to adjust the difficulty of the game by influencing the interval of
time between flashes. A RESET switch is used to reboot the microcontroller.Task:
1.
You are to breadboard
a standalone prototype of the Memory
game from the schematic that appears on the next page using the supplied
components. The software has been
uploaded to the microcontroller. Raise your hand when you have completed this
stage before bringing your circuit to my desk for a demonstration. Take a photo
and video of your working prototype for later inclusion in your ER.
2.
Dismantle the prototype and assemble a permanent
circuit on the printed circuit board provided for you. Again, raise your hand
when you have completed this stage before bringing your circuit to my desk for
a demonstration.
Procedure:
We were given the three-page exam booklet and allowed ten
minutes to read it over. After reviewing the task and having an understanding
of the circuit we were given a bag containing all the parts needed as well as
an ATMEGA328P-PU chip with working code pre-programed on it. We were then set
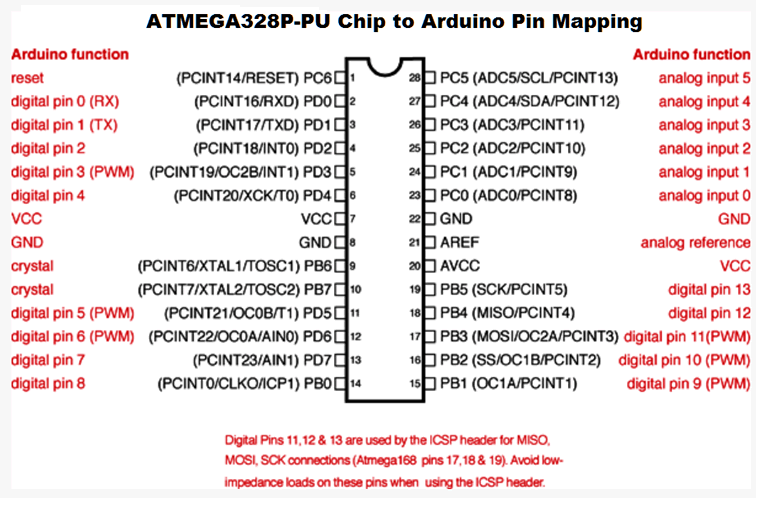
to breadboard a prototype. Breadboarding the circuit from the Eagle Diagram
added a few more challenges as opposed to reading a traditional circuit
diagram. Because Eagle’s main purpose is to provide a board view to arrange
parts, its circuit view has a number of shortcuts that are meant to allow the
user to complete the wiring quickly. Eagle designs the parts to be easy to connect,
meaning that often the pin layout will be modified so that all wires come out
of one side of the part. This means when breadboarding from the Eagle schematic we had
to pay extra attention to the pin numbers in case Eagle had rearranged them to
allow for easier wiring. The second challenge Eagle presented was its shorthand
wiring. To save time wiring a circuit in schematic view, Eagle allows the user to add Vdd and Vss
like they are parts. This means that parts that are supposed to have a common
ground, for example, never connect in the circuit diagram because they all have
separate Vss “parts” connected to them. After we either successfully wired the
breadboard or decided to move on due to the time restraint, we were given a
pre-etched and drilled PCB and had to solder all the components on to make a
standalone version of the game. Soldering was fairly trivial because the holes
were already drilled so we just had to put the parts where they fit. However
because of the Vdd and Vss problem stated above, adding the voltage regulator to
the board required a fair amount of thinking. Because the voltage regulator had
to be properly oriented and the capacitors were polarized we had to know which
ones went where and how they should be oriented. When I was confident my board
would work, I plugged in a 9v power source into the DC jack and
was pleased to see that my board worked properly. When I finished, Mr. D’Arcy
replaced my ATMEGA328P-PU chip with one that had a higher difficulty level. Because
my difficulty level didn’t change as dramatically as it should have both of us realized that I had a 10k resistor where a 1k resistor should be
and vice versa. After removing and soldering the resistors in their correct
positions my circuit worked perfectly.
Part
|
Value
|
Device
|
Package
|
Description
|
Important
|
328P
|
DIL28-3
|
DIL28-3
|
Dual In Line
|
||
C1
|
10uF
|
CPOL-USTAP5-70
|
TAP5-70
|
POLARIZED CAPACITOR, American
|
|
C2
|
1uF
|
CPOL-USTAP5-70
|
TAP5-70
|
POLARIZED CAPACITOR, American
|
|
DCJACK
|
DCJ0202
|
DCJ0202
|
DCJ0202
|
DC POWER JACK
|
|
L7805
|
78XXL
|
78XXL
|
VOLTAGE REGULATOR
|
||
LD1
|
DUOLED-RG-C
|
DUOLED-C-5MM
|
DUO LED
|
||
LD2
|
DUOLED-RG-C
|
DUOLED-C-5MM
|
DUO LED
|
||
LD3
|
DUOLED-RG-C
|
DUOLED-C-5MM
|
DUO LED
|
||
LD4
|
DUOLED-RG-C
|
DUOLED-C-5MM
|
DUO LED
|
||
LD5
|
DUOLED-RG-C
|
DUOLED-C-5MM
|
DUO LED
|
||
R1
|
220
|
R-US_0207/10
|
0207/10
|
RESISTOR, American symbol
|
|
R2
|
220
|
R-US_0207/10
|
0207/10
|
RESISTOR, American symbol
|
|
R3
|
220
|
R-US_0207/10
|
0207/10
|
RESISTOR, American symbol
|
|
R4
|
220
|
R-US_0207/10
|
0207/10
|
RESISTOR, American symbol
|
|
R5
|
1k
|
R-US_0207/10
|
0207/10
|
RESISTOR, American symbol
|
|
R6
|
10k
|
R-US_0207/10
|
0207/10
|
RESISTOR, American symbol
|
|
R7
|
220
|
R-US_0207/10
|
0207/10
|
RESISTOR, American symbol
|
|
S1
|
TL32PO
|
TL32PO
|
TL32PO
|
TINY SWITCH ON – MOM
|
|
S2
|
TL32PO
|
TL32PO
|
TL32PO
|
TINY SWITCH ON – MOM
|
|
S3
|
TL32PO
|
TL32PO
|
TL32PO
|
TINY SWITCH ON – MOM
|
|
S4
|
TL32PO
|
TL32PO
|
TL32PO
|
TINY SWITCH ON – MOM
|
|
S5
|
10-XX
|
B3F-10XX
|
OMRON SWITCH
|
||
S6
|
RACON12
|
RACON12
|
RACON12
|
ITT SWITCH
|
|
VR5
|
10K
|
TRIM_US-B64Y
|
B64Y
|
POTENTIOMETER
|
|
XTAL1
|
16MHZ
|
10G7A-12.5KHZ
|
HC49U
|
Resonator
|
Conclusion:
I thought this exam did an excellent job of testing us on
the important skills we learned during the year. Soldering under a time limit
really pushes you to keep your hand still, solder fast but make sure you are
soldering the right things. Reading off of an Eagle schematic
requires you to consciously think about the flow of the circuit, understanding
how the pins are numbered on the chip and how parts should be wired. This exam
also tested our time management skills because there was no set time on how
long you should spend on your breadboard or circuit board. Time management was
the hardest part of the exam. Everything the exam asked of us we had done
before but it had taken days or weeks to complete it. Doing it in two hours
really showed how well we understood what had to be done and what we took from our year of work. If I could do this exam over again I would clean up the
wiring and placement of parts on my breadboard. At the time I knew we were
getting graded on the appearance of our breadboard but because I knew there was
a time limit I just put parts on without thinking of the best place they should
go. I would also pay more attention when soldering parts onto my circuit board.
I had them in the correct place on my breadboard but because of the time limit
I was rushing and carelessly mixed them up in the transfer between my
breadboard and circuit board. In
conclusion I thought this exam tested us on everything we needed to be tested
on and even taught us a new skill, time management. Testing us on writing code
would be been a little inappropriate because although hardware needs coding, we
did not learn to code this year. As I am very excited to finish high school and
embark on new university hardware projects next year I will miss these types of
projects as well as the setting, style and person teaching them.